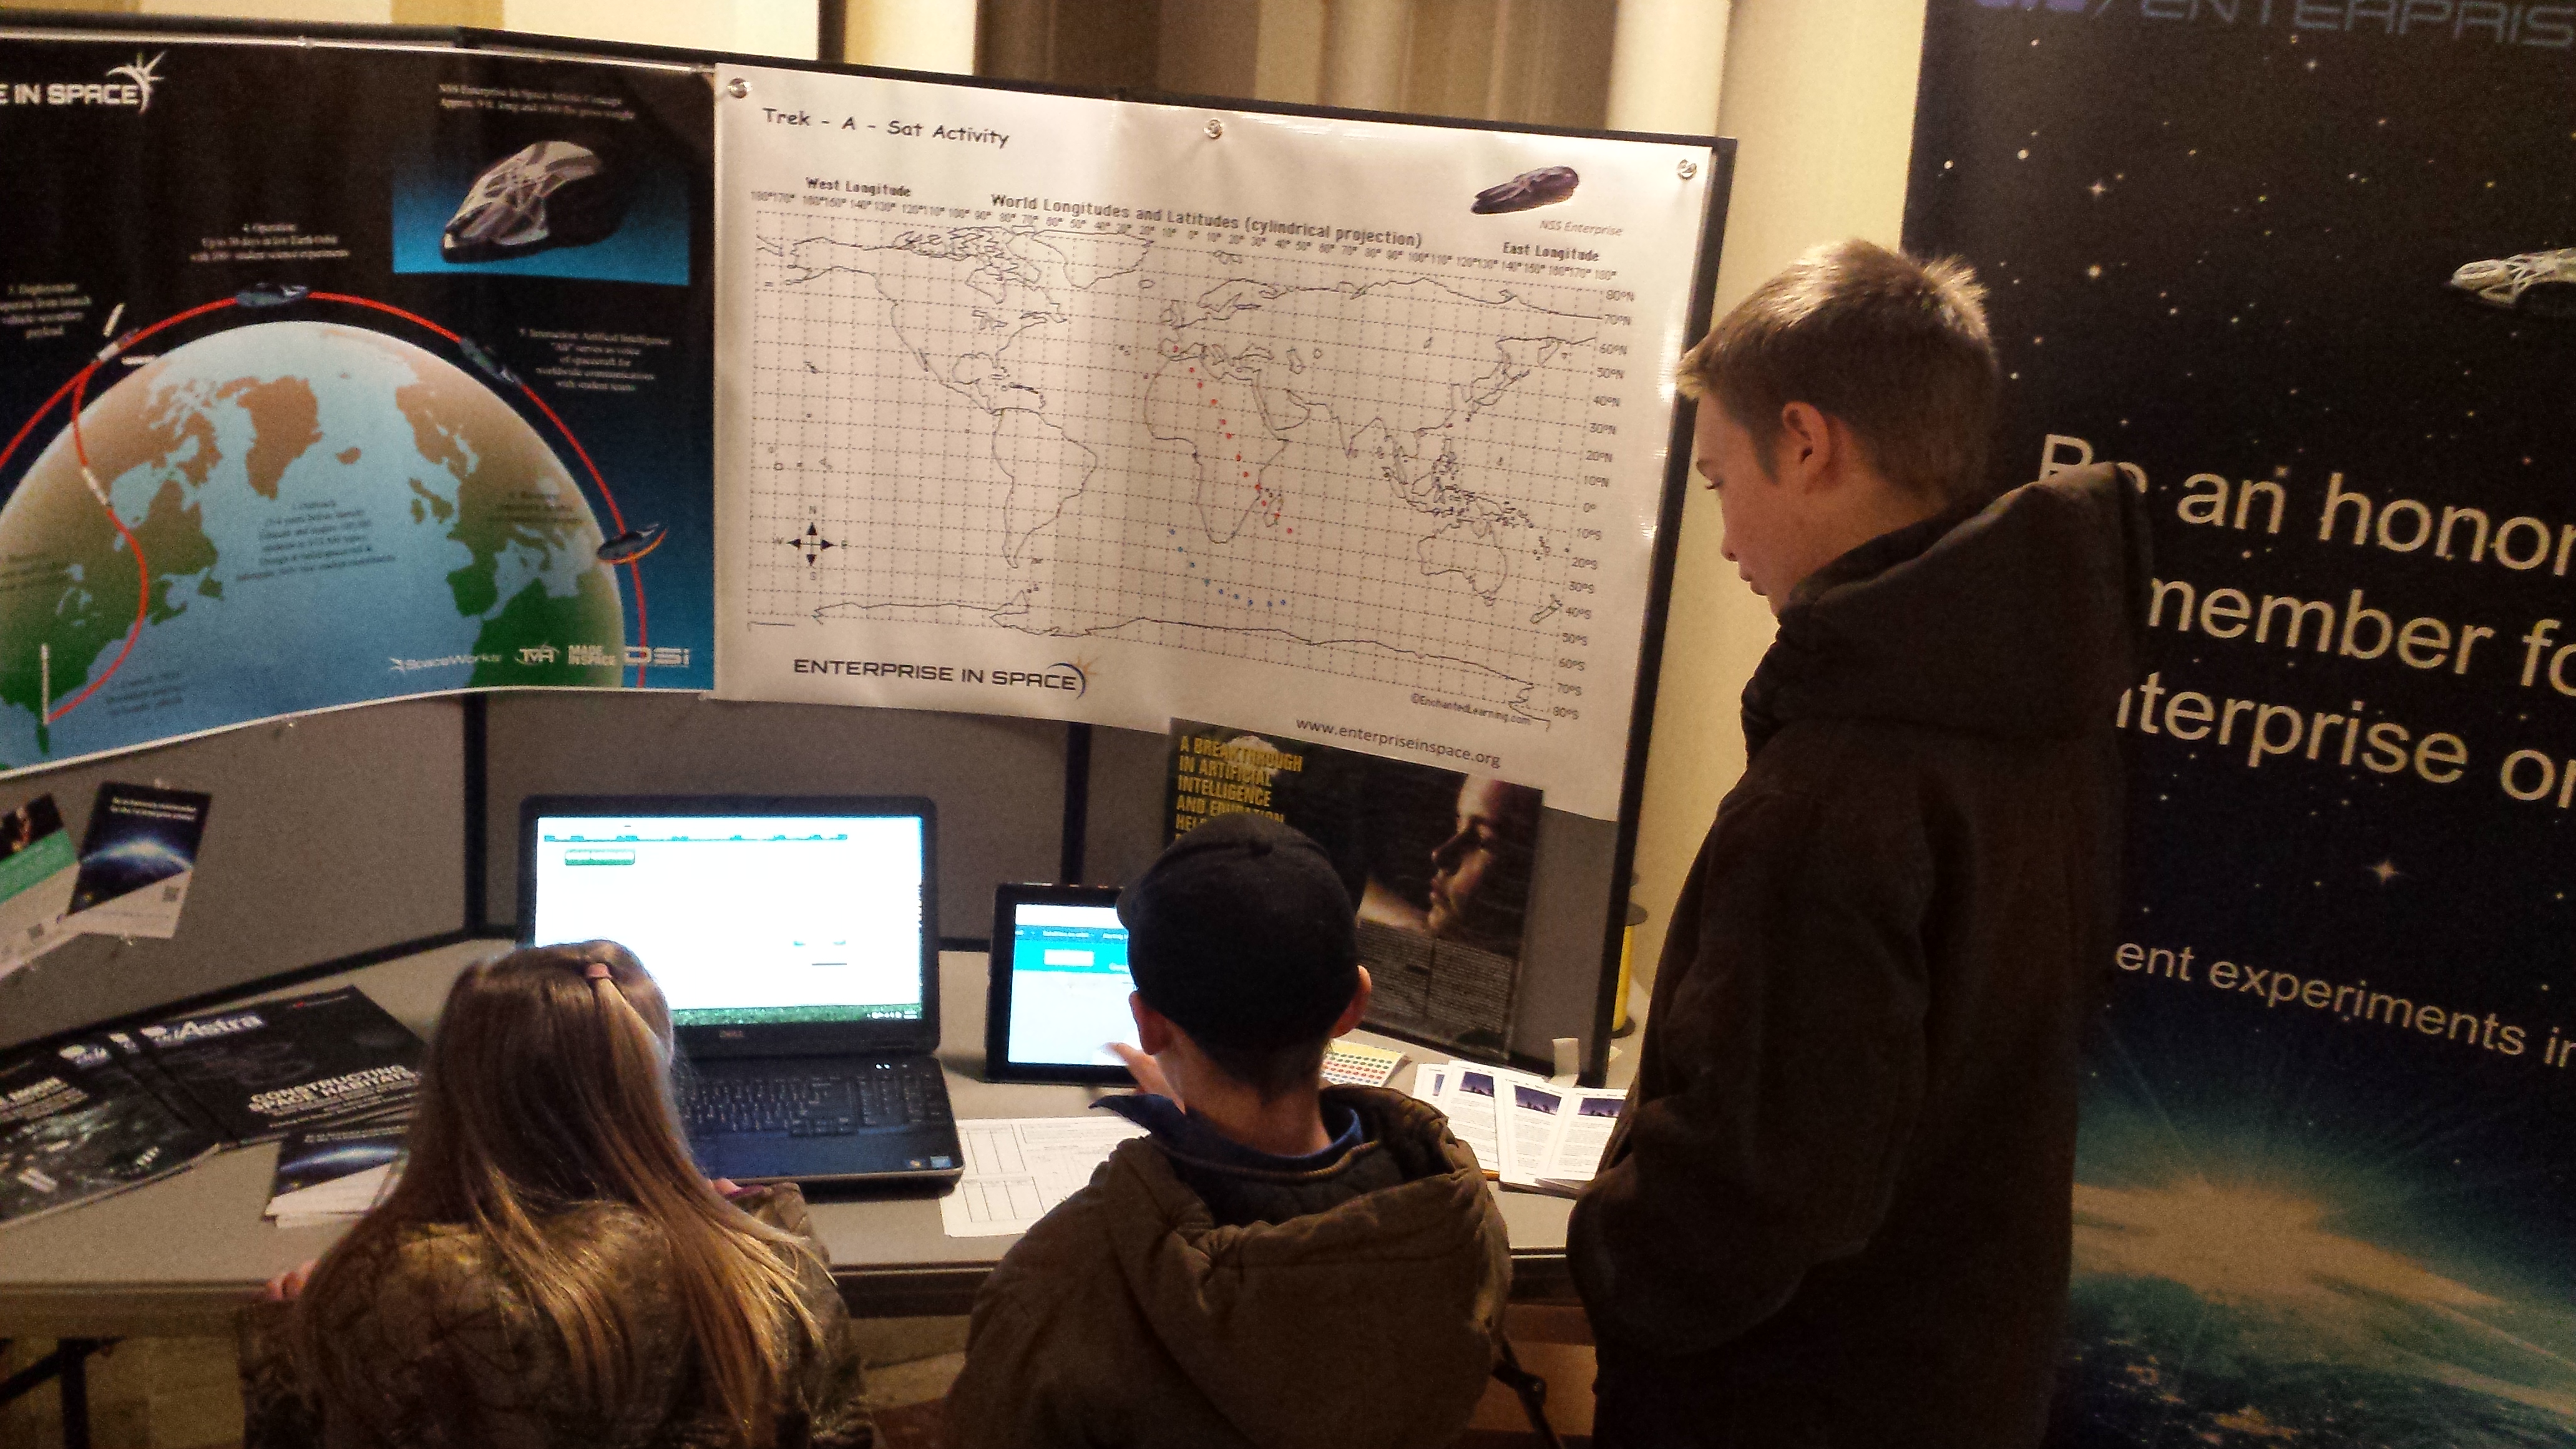
Trek-A-Sat- MS
Topic outline
-
 Written By: Frances Dellutri, Middle School/Intermediate Level EIS Education Team, June 2016
 EIS Topic: Atmosphere, Centripetal Force, Computers, Mathematics, Micro-gravity, Free-fall, Orbital Mechanics, Physics, Satellites, Spacecraft, Weightlessness
Grade (Age) Level: Grades 5-8 (Ages 10-13)
Key Topics Associated with Standards: Collecting, Analyzing and Interpreting Data; Gravitational Interactions; Forces and Motion, Relationship between Energy and Forces
A satellite is moving overhead every few minutes and it's fun to be able to identify them, watch for them, and track them. This project gives great direction on how to track satellites overhead, both visually and electronically.
Trek-A-Sat gives you the tools to track a satellite in the sky right now in real time!
If you would like to learn more about satellites, their orbits and the forces involved with orbiting satellites, log into The EIS Academy and learn about satellites in the lesson called "Satellites - Understanding How They Work! "
https://www.eisacademy.org/course/view.php?id=54
If you are ready to start tracking satellites, move ahead to join the lesson where you wish!
INDEX
Section 1. Trek-a-Sat
Section 2. Understanding Where Satellites are Found
Section 3. Looking at Factors That Affect the Orbit Time and Position of Satellites.
Section 4. How did You Use this Lesson
-
2. Understanding Where Satellites Can Be Found.
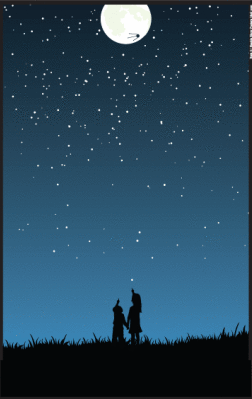
HighlightedHave you gazed up into the sky and wondered about a moving point of light?

You should not have to wait more than 15 minutes to spot one of the more than 35,000 satellites now in orbit around Earth. It will appear as a steadily moving star across the sky but only lasts for a few seconds or minutes.
If you see blinking lights , you probably are seeing a plane, not a satellite. The satellites you can see are large enough (typically more than 20 feet or 6 meters in length) and low enough (100 to 400 miles above Earth or 160-644 km)) to be most readily seen as sunlight reflects off them and beams right onto your location.
http://veryshareimg.com/looking-up-at-stars.html
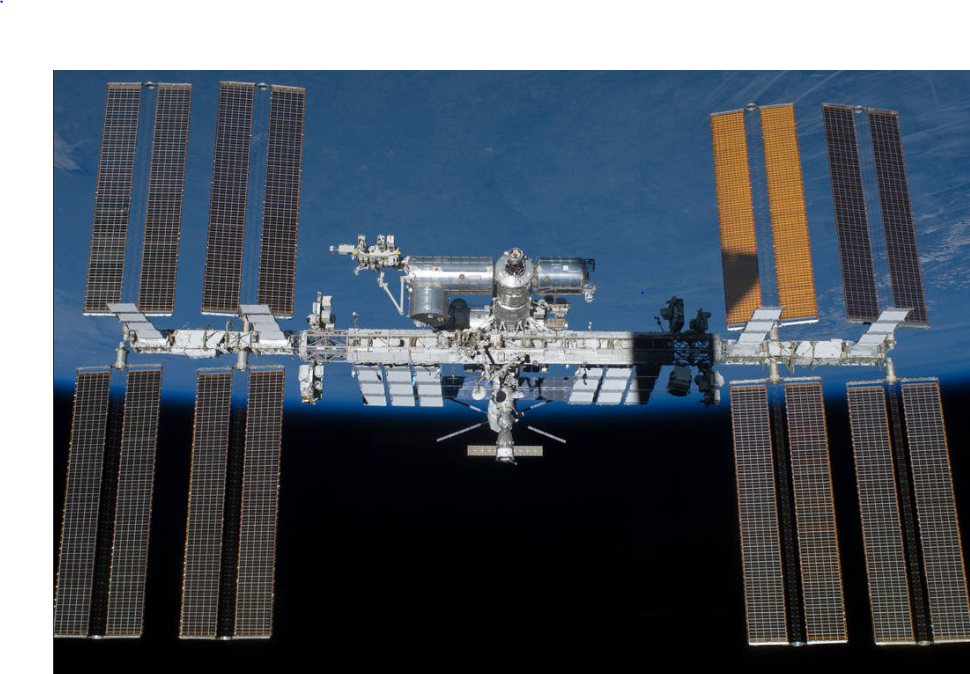
NASA operates a website called 'Spot the Station' which provides opportunities to spot the International
Space Station by giving a text listing of the location by city. You can also sign up to hear about the opportunities via email or on your cell phone. This great website is:
https://spotthestation.nasa.gov/sightings/
The NSS Enterprise orbiter will be launching in 2020-2021 with student experiments on board and will become one
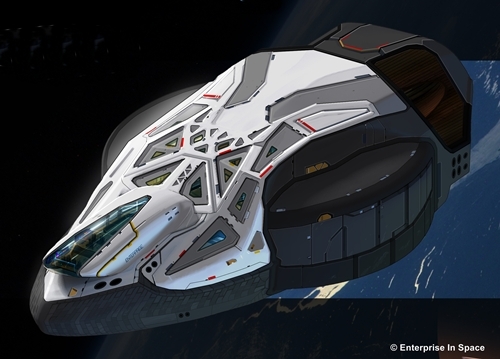 of the
visually and electronically track-able satellites. This Trek-A-Sat Activity will prepare you for tracking the NSS Enterprise !
of the
visually and electronically track-able satellites. This Trek-A-Sat Activity will prepare you for tracking the NSS Enterprise !Let's take a look at the behavior of a satellite as seen from the ground.
Satellites can often be seen from the ground with the naked eye and many satellites can be tracked as they orbit Earth. This activity will show you how to track satellites.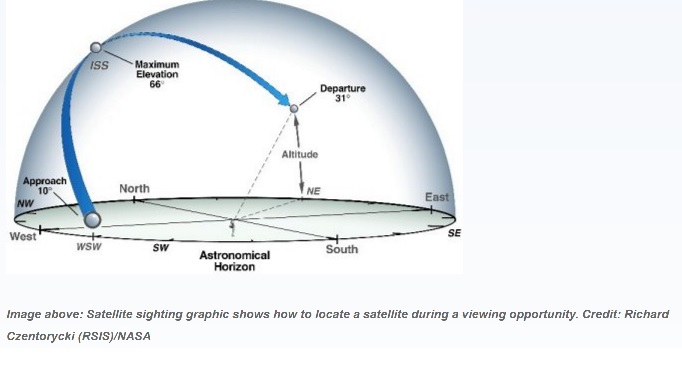 In this diagram, you can see the ISS (International Space Station) move from west to east and at it's zenith (top most elevation) is at 66 degrees from the horizon.
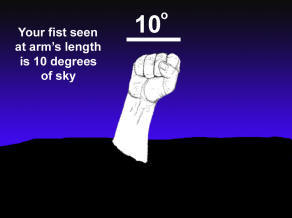
 You can determine the degrees in elevation (up from the horizon) or the azimuth (degrees from a direction such as due North) by extending your arm at shoulder level and making a fist. From the pinky finger to the closed thumb over your fist is 10 degrees. Each finger represents 2 degrees.
 This is a very fun measurement and is reliable.
daphne.polarmar.edu
Try the Measurement for yourself:
Find a place outside where you can see the horizon (a place where the sky meets the ground)
Let's try an altitude measurement. (Altitude is the measurement in degrees from the horizon up into the sky.)
1.. Extend your arm directly in front of your body at shoulder height. Make a fist (vertically) with the thumb on the outside of your first. (Let's say your right arm and fist.) This will be Arm #1. As you look down your arm this fist represents 10 degrees. The bottom of the fist should be even with the horizon. Freeze that arm in the air.
2. Now make a similar fist with your other arm and hand. Place the second fist (let's say the left arm and fist) and set it on top of the frozen arm being careful to keep your arm fully extended. Don't let Arm #1 slip down toward the ground! You now have 20o . Now freeze Arm #2 and place the extended Arm #1 and fist on top of Arm #2 fist and freeze it again. (You have now marked 30 degrees from the horizon.)
3. Repeat this procedure, counting the number of times you add a fist until you have reached directly over your head. You should need 9 fists to do this. 9 x 10o means that directly overhead is 90o from the horizon - a right angle!
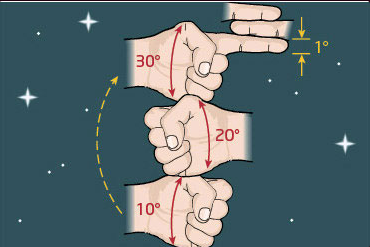
4. If you required more than 9 fists, then you are 'slipping' when you overlap them or your arms are not fully extended or your thumb is not on top of your fist. or perhaps you are not bringing the fists so that they touch before you bring another fist around. If you required less than 9 fists to move from the horizon to directly overhead you then you may be moving your hand up as you bring the other fist around or possibly. Have someone watch what you are doing for feedback. If you were successful, move ahead!
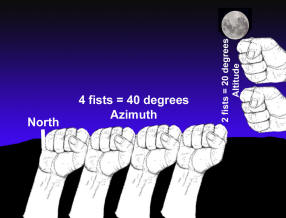
Let's try an azimuth measurement. (Azimuth is the degrees around the horizon,)
1. Set up the four directions North, South, East, and West and mark them. You can also use a compass to determine where the directions are. This exercise works best if you label the directions 20 (about 6 meters) from the person trying to take the azimuth.
2. You can start this activity where due North is and work from there or start at another directional point (East, South, or West.)
3. Extend Arm #1 again at the horizon and make a fist, but turn your fist so that it is parallel with the ground (horizontal rather than vertical as with the altitude measurement). Take a look at the diagrams in blue above.
4. Extend your arm again at shoulder height and place your fist so that the smallest finger is even with the direction (N,S,E,W). Freeze that arm and fist and then extend the arm and fist and place it next to the first fist, keeping the arms at shoulder height and fully extended. Continue one fist next to the one before until you get to the next direction's mark. Again, you should have required 9 fists to move from one direction to another (example: due North to due East) because there is 90o between the directions. ( A circle has 360o and there are 4 directions, 360 ÷ 4 = 90).
5. If you are having trouble getting the nine fists in the 90 degree segment, take a look at the tips in the altitude measurement section.
Applying Altitude and Azimuth Measurements
Now that you know how to pin point a position in the sky using altitude and azimuth, when you get notification that a satellite will be in your area, you can then anticipate where in the sky it will be! Enjoy your visual tracking!
 https://teachtheyoungerwomen.files.wordpress.com/2013/02/school20assemblies-nightsky.gif